背景
我用Hugo生成的静态博客部署在腾讯云CVM上,只有一个实例,存在单点风险,也不能实现负载均衡。所以想托管在GitHub Pages,本文简单记录实现过程。
1. 在Github 创建两个代码库
首先我创建了以下两个代码库:
blog-hg托管博客原内容(Hugo 站点)mbyd916.github.io托管生成的静态页面
2. 添加 git 子模块
把第二个代码库作为第一个的子模块,具体来说,把Hugo站点 public 目录设置为引用子模块。
git submodule add https://github.com/mbyd916/mbyd916.github.io.git public
3. 添加部署脚本
在 blog-hg 代码库添加以下脚本文件,通过hugo 重新生成静态博客后,再把静态内容推送到代码库 mbyd916.github.io。
#!/bin/bash

echo -e "\033[0;32mDeploying updates to GitHub...\033[0m"

# Build the project.
hugo # if using a theme, replace by `hugo -t <yourtheme>`

# Go To Public folder
cd public
# Add changes to git.
git add -A

# Commit changes.
msg="rebuilding site `date`"
if [ $# -eq 1 ]
  then msg="$1"
fi
git commit -m "$msg"

# Push source and build repos.
git push origin master

# Come Back
cd ..
完成这步后,我的静态博客就可以通过 https://mbyd916.github.io 访问啦 :-)
4. 关联我的域名
最后还想通过自己的域名访问该站点,GitHub Pages 提供设置个性化域名的功能。
进入mbyd916.github.io代码库设置,找到 GitHub Pages 相关配置。
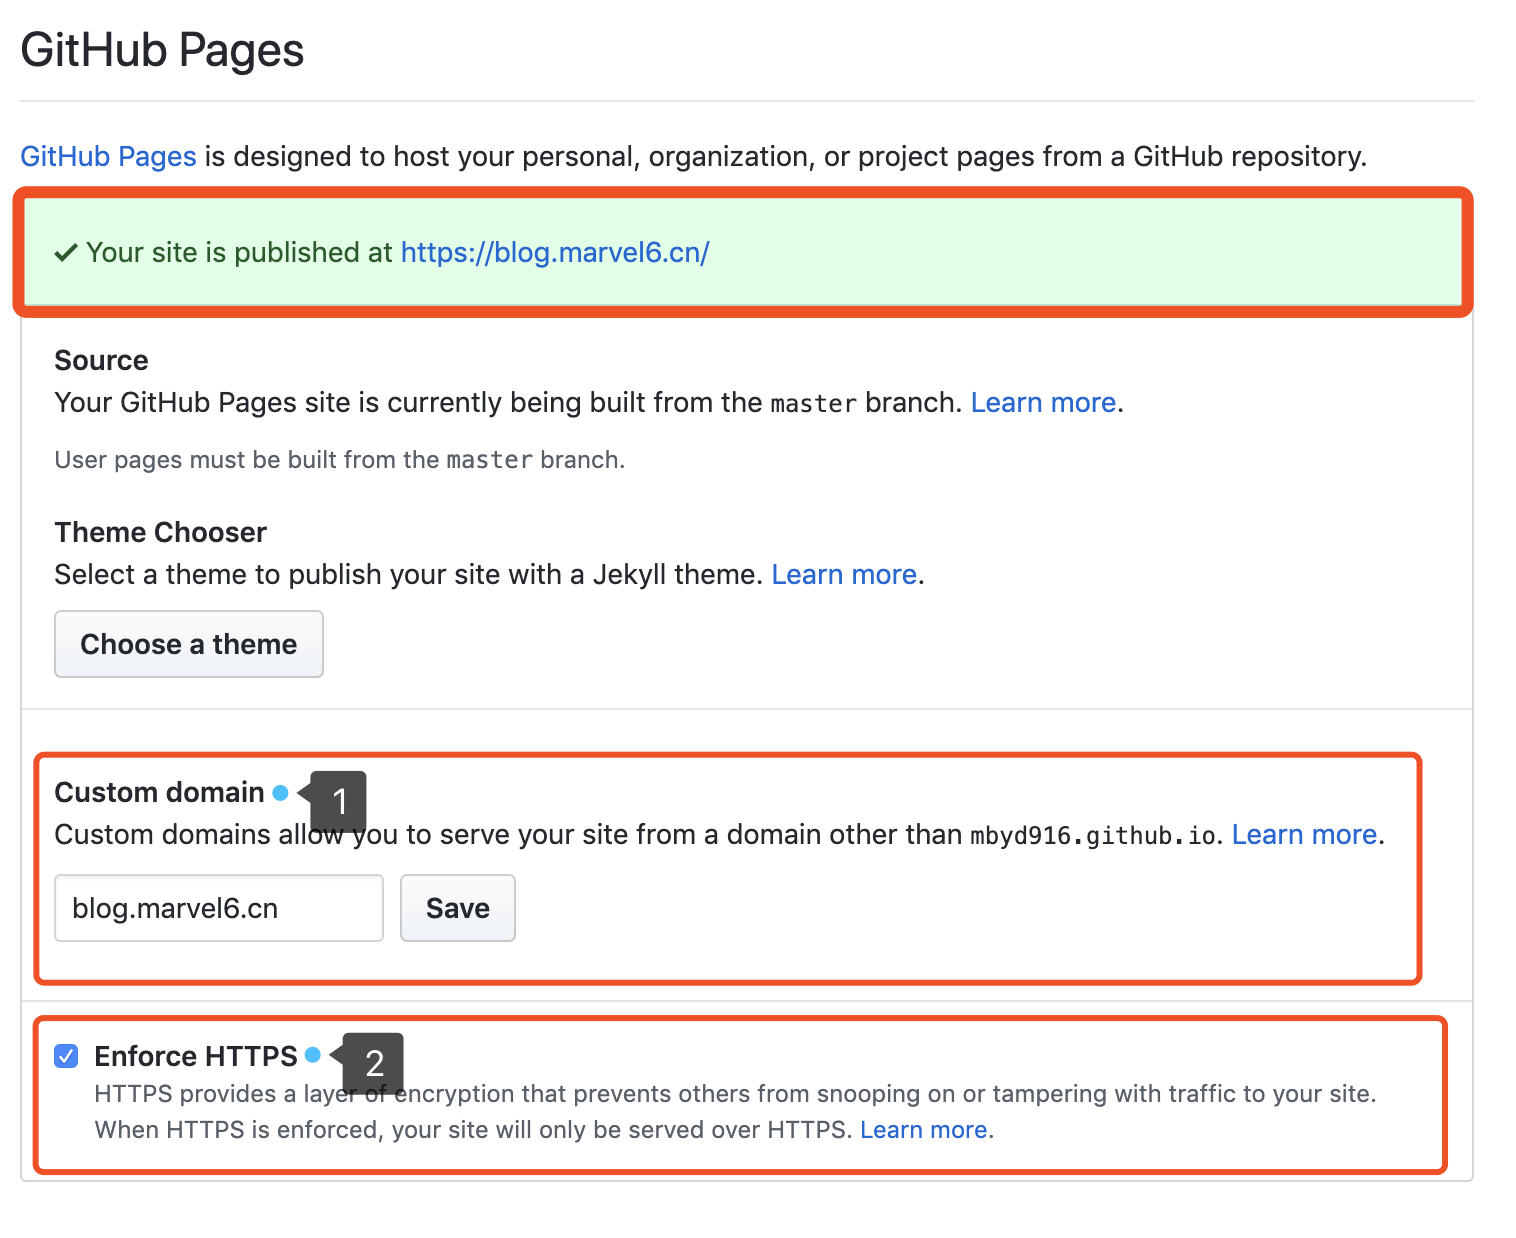
填写域名并保存,这时会在代码库新增一个文件CNAME,文件内容为:
blog.marvel6.cn
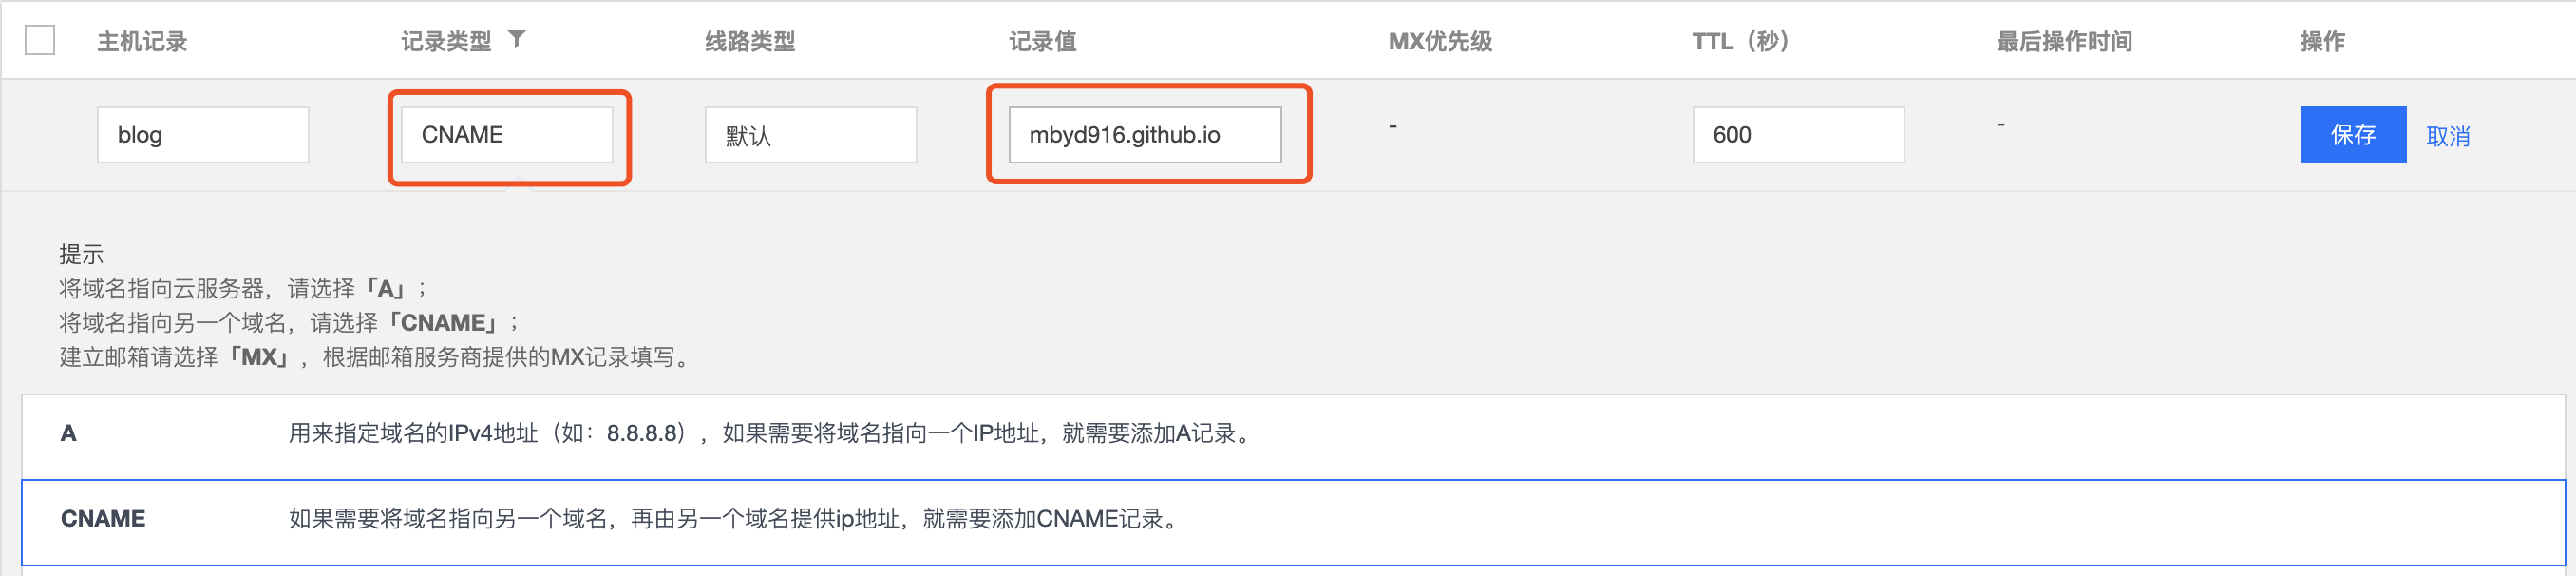
接下来还需要在腾讯云域名解析,新增一条 CNAME 记录,从 blog.marvel6.cn 指向 mbyd916.github.io。
配置后,通过 dig 查看是否生效;
dig blog.marvel6.cn +nostats +nocomments +nocmd


; <<>> DiG 9.10.6 <<>> blog.marvel6.cn +nostats +nocomments +nocmd
;; global options: +cmd
;blog.marvel6.cn.		IN	A
blog.marvel6.cn.	30	IN	CNAME	mbyd916.github.io.
mbyd916.github.io.	30	IN	A	185.199.111.153
mbyd916.github.io.	30	IN	A	185.199.110.153
mbyd916.github.io.	30	IN	A	185.199.108.153
mbyd916.github.io.	30	IN	A	185.199.109.153
现在通过 https://blog.marvel6.cn 也可以访问啦